Create an E-Commerce App for iOS and Android in Minutes
Build a fully functional e-commerce app for iOS and Android in minutes using our premium React Native e-commerce template. This guide walks through setup, Firebase integration, Stripe payments, and publishing to app stores.
Overview
Here's the complete roadmap to create your e-commerce app:
- Configure your development environment
- Install npm packages
- Run the app on Android
- Run the app on iOS
- Link your own Firebase account
- Create categories & products in Firebase
- Set up Stripe Payments
- Publish app to App Store & Google Play
Looking for a custom mobile application?
Our team of expert mobile developers can help you build a custom mobile app that meets your specific needs.
Get in TouchConfigure Your Development Environment
To run React Native apps on iOS and Android, install these developer tools:
- Node.js and React Native
- Android Studio (for Android)
- Xcode (for iOS)
- Visual Studio Code (recommended for Windows users)
For a comprehensive setup guide, see our React Native Development Environment documentation.
Install npm Packages
Open a Terminal, navigate to your project directory, and run:
npm install
Windows users: Use Visual Studio Code's built-in terminal for compatibility with UNIX commands.
Running the App on Android
Ensure npm packages are installed. You'll need either a physical Android device or an Android emulator.
Ship faster with All Access. Get the React Native templates, admin panels, updates, and launch bonuses that help you build faster.
Explore All AccessSetup
- Device: Plug in via USB cable
- Emulator: Open Android Studio → Tools → AVD Manager → Start an emulator

Run
react-native run-android
The metro bundler should start automatically. If not, open a new terminal and run npm start.
For debugging, check our React Native Errors documentation.
Running the App on iOS
Ensure npm packages are installed. You need a Mac to run iOS apps. Windows users must use a virtual machine or Apple computer.
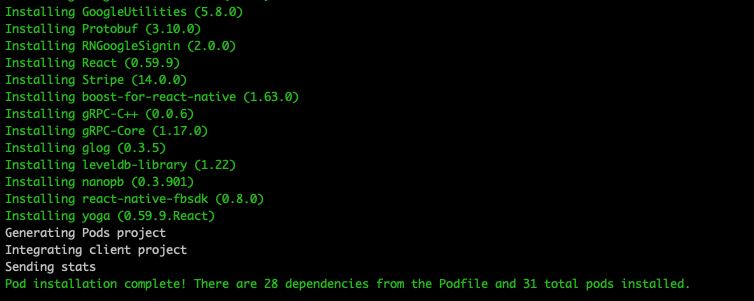
Install Dependencies
Install Cocoapods and Xcode, then:
cd ios && pod install
Run
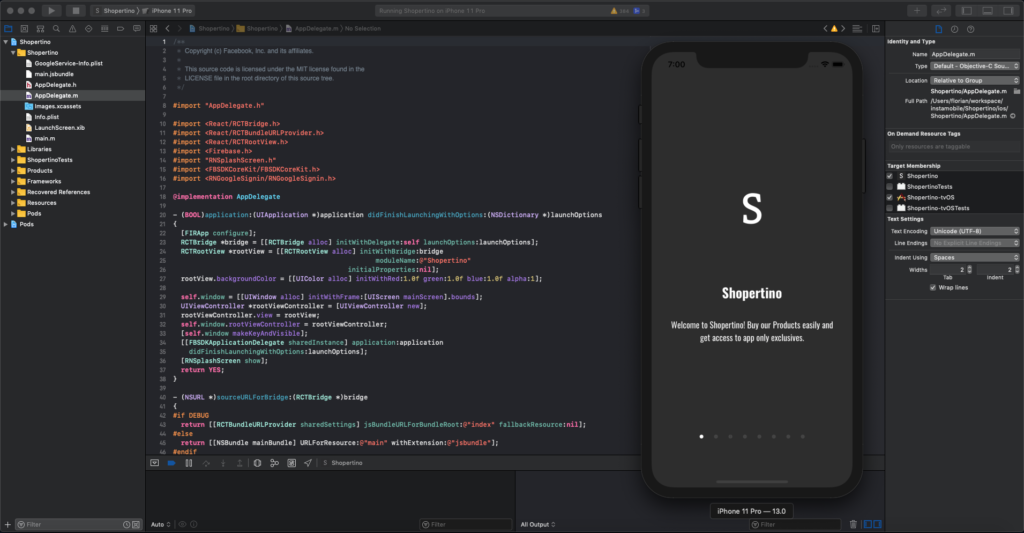
Open ios/Shopertino.xcworkspace in Xcode, select a device/simulator, and run the app.
Link Your Own Firebase Account
By default, the app displays demo products and sends test purchases to our Stripe account. To make it production-ready, link your own Firebase and Stripe.
Setup Firebase
- Create a Firebase account and project
- Create an app within that project
- Download the config files:
- iOS:
GoogleService-Info.plist→ override inios/Shopertino/ - Android:
google-services.json→ override inandroid/app/
- iOS:
- Enable Firebase Authentication, Firestore, and Storage with public read/write rules
For detailed setup, see our Firebase Integration tutorial.
Run the app again. It should now be empty. Create a new user and verify it appears in your Firebase Console.
Create Categories & Products in Firebase
Add your catalog to Firestore via the Firebase Console.
Ship faster with All Access. Get the React Native templates, admin panels, updates, and launch bonuses that help you build faster.
Explore All AccessAdd Categories
Create a collection named shopertino_categories with the following structure:
| Field | Type | Example |
|---|---|---|
| id | string | "electronics" |
| name | string | "Electronics" |
| photo | string | "https://..." |
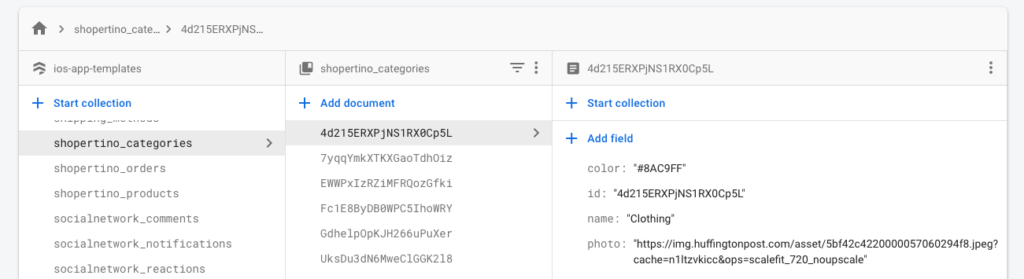
Important: The id field must match the category identifier exactly.
Add Products
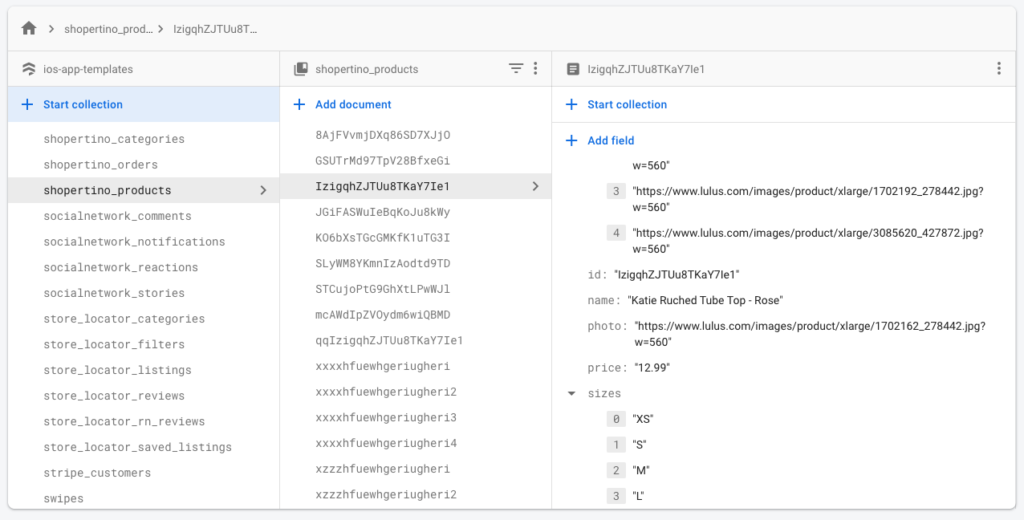
Create a collection named shopertino_products with fields for product details:
| Field | Type | Example |
|---|---|---|
| name | string | "Laptop" |
| price | number | 999.99 |
| category | string | "electronics" |
| photo | string | "https://..." |
| description | string | "High-performance laptop" |
Set Up Stripe Payments
To accept payments, set up a Stripe account and get your API keys.
Update Configuration
- Open
src/constant.jsand add your Stripe publishable key - Open
stripeServer/.envand add your Stripe secret key
Backend Server
You need a server to securely process payments. Follow our Stripe Integration for React Native guide for complete setup.
Next Steps
Your e-commerce app is now ready! Customize branding, add more products, and publish to the App Store and Google Play.
Questions? Reach out—we're here to help!