In this section, we are describing the steps that you need to do in order to run our React Native app templates on iOS, from setting up the environment to building the project in Xcode. To run a React Native on iOS, you need Mac OS and Xcode, but there’s no need for an Apple developer account or an iPhone – you can simply run any Xcode project on the iOS simulator. If you are not new to iOS / React Native development, and you already have the dev environment set up, simply do the following steps:
- Be absolutely sure you have the latest STABLE Xcode version (Make sure you are using Xcode 14.1 or latest)
- Run “yarn install && cd ios && pod install” in the root folder of the downloaded project
- Open .xcode.env read the instruction and set up .xcode.env.local
- Go back a directory with the command “cd …” and build your app with “npx react-native run-ios“
- Select the iOS simulator / device and build and run the app (Command + R)
If this is the first time you are running an iOS project on your machine, you need to set up your environment first. We recommend you to follow the official Facebook documentation first, on how to run React Native CLI apps. There are a few prerequisites that are iOS specific (you don’t need them for Android):
- Install Xcode
- Install CocoaPods
- Install React Native
We’re assuming you already have the environment to run react native apps. If not, follow Facebook’s documentation for running native apps (do not use Expo, you don’t need it). Follow the next quick steps to get your app running on an iOS device or iOS simulator.
1. Run “yarn install” in the project root directory
Please make sure you are currently running node 16.
check with command “node –version“. If not, use nvm and run “nvm use 16″
Then install dependencies with “yarn install“.
2. Locate the ios folder and run “pod install“
This will install all the pods that the chat app depends on, such as Firebase Auth, Storage, etc. Make sure you have Cocoapods installed beforehand. Here’s how a successful output looks like: 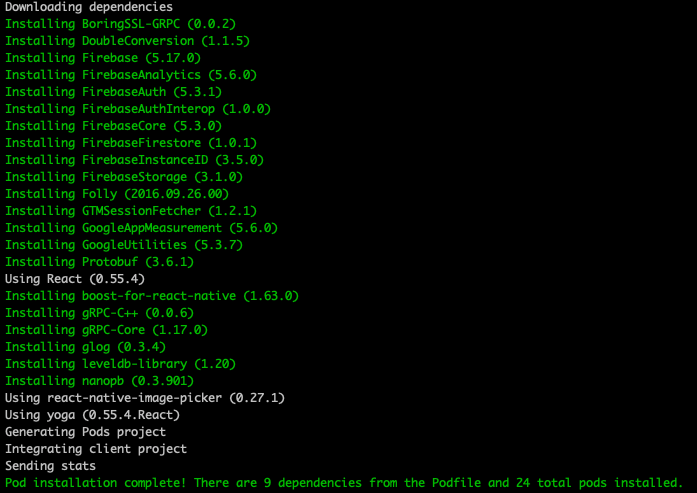 This will also generate a .xcworkspace file, that can be opened in Xcode.
3. Open “.xcode.env” read the instruction and set up “.xcode.env.local”
At the end of the day, you want to have a “.xcode.env.local” file
containing one line of code. eg:
“export NODE_BINARY=”/Users/sholaEmmanuel/.nvm/versions/node/v16.13.0/bin/node“
to get the absolute path to your node version, from command line, run the command: “command -v node“.
You will get – “/Users/sholaEmmanuel/.nvm/versions/node/v16.13.0/bin/node”.
now update xcode.env.local with this.
4. Go back a directory with the command
Simply go back a directory with “cd ..“. Double check on the file in the terminal (make sure you are in the root project folder).
5. Run Command “npx react-native run-ios”
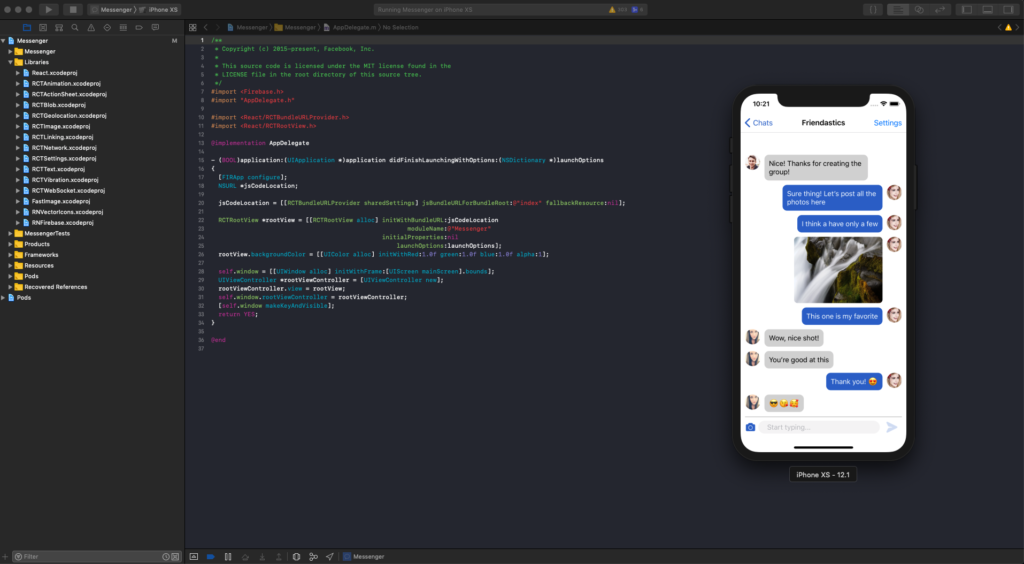
Now build your app with the command “npx react-native run-ios“.
Once your ios app builds successfully, remember to click on your simulator and press on your keyboard, (Command + R ) to refresh js bundle after it is has finished compiling.
Frequently Asked Questions
1. I’m getting a red screen error saying the metro bundler is not running Sometimes, Xcode cannot open the metro bundler by itself, so you need to open it manually. To do that, simply open a Terminal window, locate the project folder and run:
yarn install && npm start -- --reset-cache
Now, the packager server has started – keep this window open and re-build the project in Xcode.
2. I’m getting a glog error (/configure:-1: in `node_modules/react-native/third-party/glog-0.3.4′:) This error might appear in some environments. To fix it, locate the glog folder. Assuming you’re in the root folder:
cd node_modules/react-native/third-party/glog-0.3.4/
And run
./configure
Now run your Xcode project again and the error will be gone.
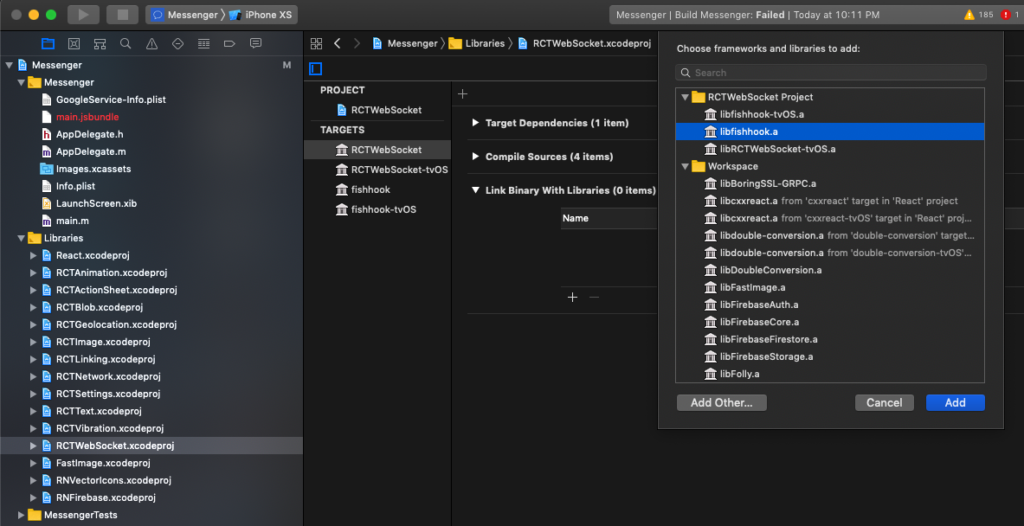
3. I’m getting error: Build input file cannot be found: ‘node_modules/react-native/Libraries/WebSocket/libfishhook.a’ If you run into this error, click on the RTCWebSocket subproject in Xcode -> Build Phases -> Link Binary with Libraries and remove the libfishhook.a entry. Now add it again (yes, it’s crazy – welcome to react native!). Then re-build the project and everything should work now.