React Native Food Delivery App Template Tutorial
Learn how to build your own restaurant food delivery app using our premium React Native food delivery app template. This guide covers Firebase setup, building on iOS and Android, and publishing to the App Stores.
Adding Restaurant Data to Firebase
1. Create Your Own Firebase App
Head over to Firebase Console and create a new project by clicking "Add Project". Type in the desired name and add your project. Make sure you are logged in first.
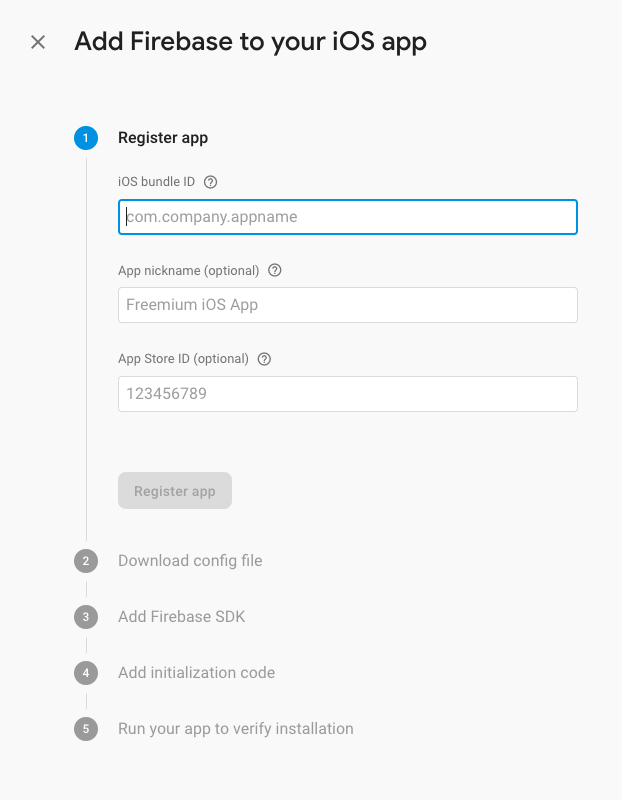
2. Create iOS and Android Apps in Your Firebase Project

Tap the "+" button below the project title, choose the app type, and fill out the form:
- iOS: Use
org.reactjs.native.example.RestaurantAppas the Bundle ID. Leave remaining fields empty. - Android: Use
com.restaurantappas the Package Name. Leave optional fields empty.
3. Enable Firebase Authentication and Firestore
In the Firebase Console, after selecting your project:
- Enable Firebase Authentication
- Make sure you enable Facebook in the Sign In methods tab
4. Download and Override Configuration Files
Go to Project Settings (Settings icon in the sidebar).
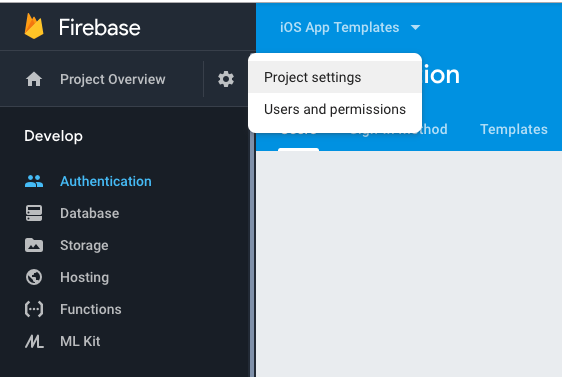
Select your app and download the configuration files:
- Android: Download
google-services.jsonand replace it atpath_to_downloaded_template/android/app/google-services.json - iOS: Download
GoogleService-Info.plistand replace it atpath_to_downloaded_template/ios/RestaurantApp/GoogleService-Info.plist
This step gives your app access to your Firebase Database.
5. Add Food Items and Categories to Firebase Firestore
Add two data collections to Firebase:
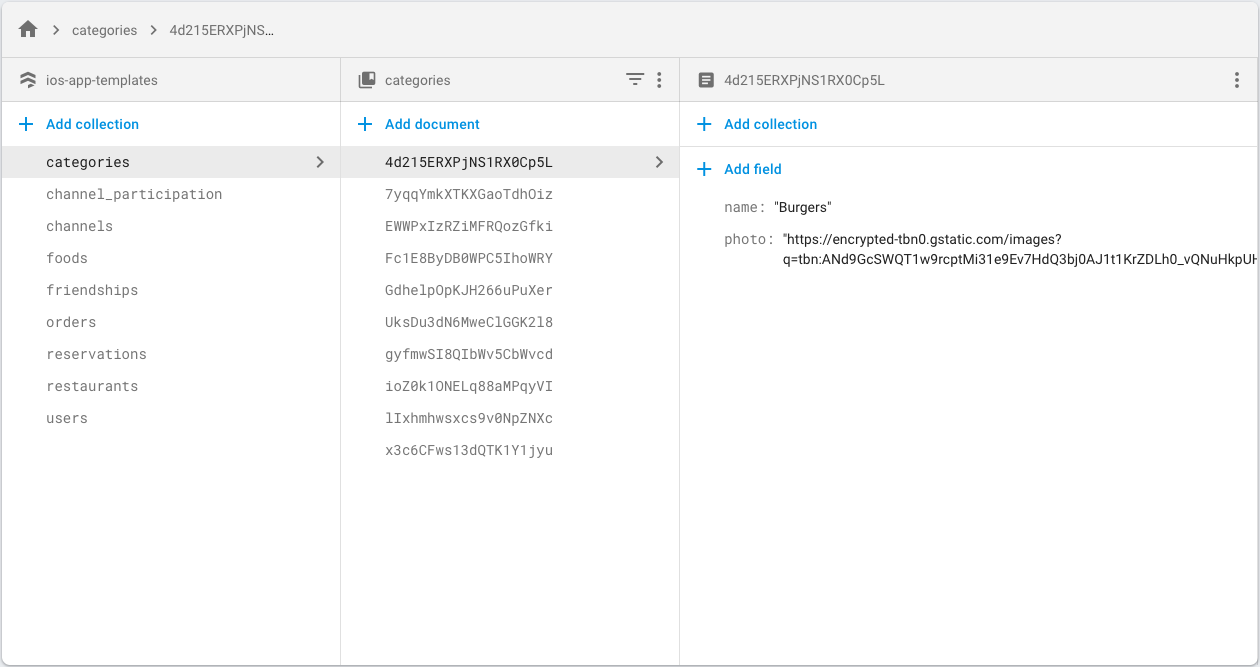
Food Categories ("categories")
Each category has two properties:
name(string)photo(URL)
Food Items ("foods")
Each food item contains:
name– Product namephoto– Main image URLcategory– Collection ID of the product's category (must match an existing category)description– Short description stringprice– Price stringdetails– Array of image URLs for the carousel on the product details screen
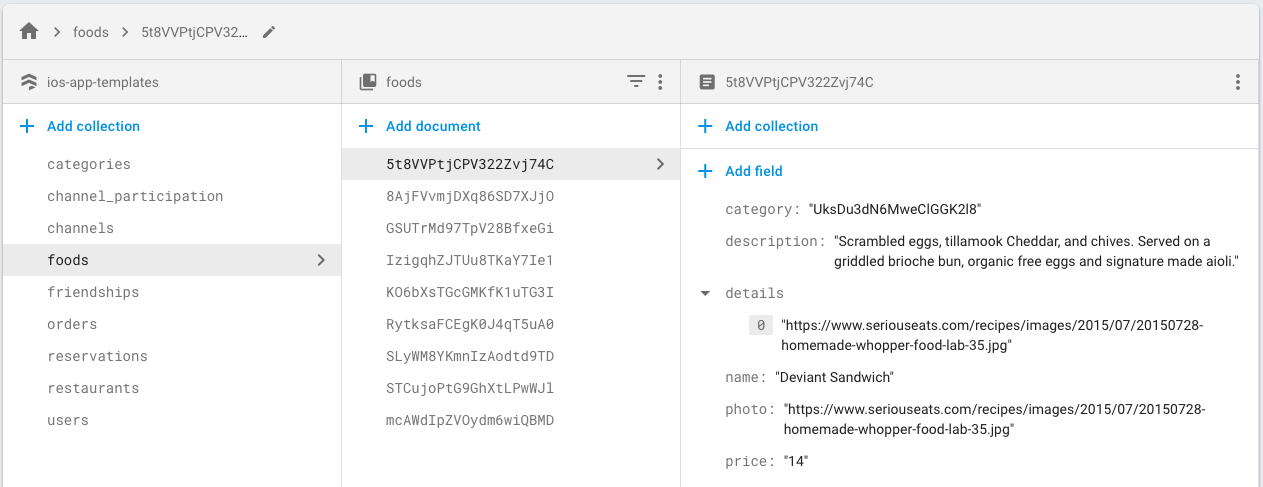
The category field must match an existing category ID exactly to avoid issues.
Collections for reservations and orders will be automatically created as users interact with your app.
6. Add Your Restaurant Details to Firebase
Create a restaurants collection with one document containing:
- Restaurant name
- Address
- Cover photo (URL)
Use exact field names as shown:
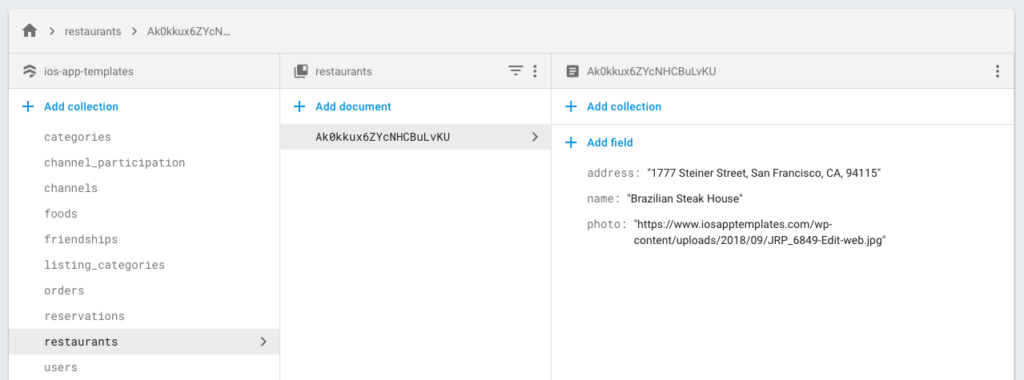
This information is used on the Reservations screen.
Building the iOS Restaurant App
1. Navigate to the Project Directory
cd ~/Users/your_user/Downloads/Restaurant-UberEats
2. Install Node.js Dependencies
npm install
Make sure you have Node.js installed first.
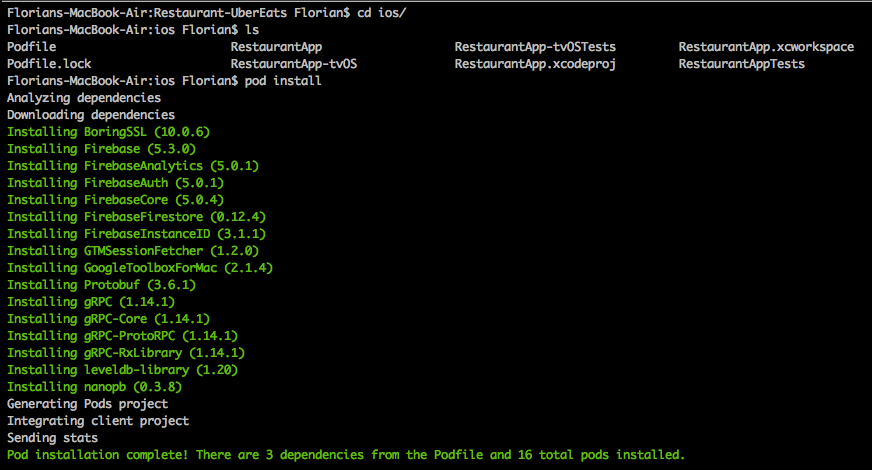
3. Install CocoaPods Dependencies
cd ios
pod install
This installs all iOS dependencies. If you're new to CocoaPods, follow the official CocoaPods guide.
4. Open the Xcode Workspace
open RestaurantApp.xcworkspace
Make sure you have Xcode installed.
5. Override Firebase Configuration Files
Replace your Firebase config files as described in step 4 of the Firebase setup section above. This is critical for the app to display your data.
6. Update Facebook Login Configuration
Create an iOS Facebook app on the Facebook Developers portal.
Open ios/RestaurantApp/Info.plist in a text editor and update the Facebook configuration:
<key>CFBundleURLTypes</key>
<array>
  <dict>
    <key>CFBundleURLSchemes</key>
    <array>
      <string>fb285315185217069</string>
    </array>
  </dict>
</array>
<key>FacebookAppID</key>
<string>285315185217069</string>
<key>FacebookDisplayName</key>
<string>iOSAppTemplates</string>
Use org.reactjs.native.example.RestaurantApp as the Bundle Identifier in Facebook setup.
7. Build and Run the iOS App
Click Product → Run (or Command + R) in Xcode. Select your target device/simulator from the top menu bar.
At this point, your restaurant app should display data from your Firebase database.
8. Submit to App Store
Follow Apple's submission guidelines to publish your app to the App Store. Use great screenshots and descriptions to optimize for installs.
Running the Android Restaurant App
1. Navigate to the Project Directory
cd ~/Users/your_user/Downloads/Restaurant-UberEats
2. Install JavaScript Dependencies
npm install
Make sure Node.js is installed.
3. Open an Android Emulator
The easiest way is via Android Studio. Download Android Studio, open it, and go to Tools → AVD Manager. Select a virtual device and tap the Play button.
Alternative: Plug in a Physical Device
If you have an Android device, plug it in via USB and accept the requested permissions.
4. Replace the Firebase Configuration File
Update android/app/google-services.json with your Firebase config file (from step 4 of Firebase setup).
5. Update Facebook Login Configuration
Open android/app/src/main/res/values/strings.xml and replace the Facebook App ID:
<string name="facebook_app_id">your_own_FB_Android_APP_ID</string>
Create an Android app on the Facebook Developers portal.
Use these values:
- Package Name:
com.restaurantapp - Default Activity Class Name:
com.restaurantapp.MainActivity
6. Build and Run the App
react-native run-android
The app will build and launch on your connected device or emulator.
Next Steps
Your food delivery restaurant app is now live! Customize the UI, add more menu items, and submit to the Google Play Store. For questions, reach out to our support team.