You’re looking to make your own real estate mobile app by using our premium Real Estate React Native App Template. To start your real estate app development process, follow this detailed documentation. Everything shouldn’t take more than 15 minutes and there’s no coding required. In this tutorial, you’ll learn how to make a real estate app like Zillow or Trulia in only a few minutes and without coding. Let’s get started.
1. Download our premium real estate mobile app template
- Our fully functional real estate app template will enable you to launch a mobile app with no coding
- The app is written in React Native, so it’s optimized for both iOS and Android
- The app is using Firebase as the backend, so you can submit your real estate mobile app to both app stores today
After you’ve downloaded the source code, make sure you unzip the archive and remember where you’ve put the folder (its path).
2. Run Your Real Estate App on Android
To start your real estate app development process, let’s first take a look at and play with the newly purchased app. If you own an Android phone, just plug it into your laptop. If you don’t have an Android device, but still want to see how the app looks like on Android, install Android Studio and use one of its Android emulators. Follow the next steps to get started with the React Native Real estate app:
- Plug an Android device into your computers / Open an Android emulator
- Open a terminal window, locate the folder of the app template (by using “cd ~/path_to_folder/RealEstateApp“) and run:
npm install && react-native run-android
This will download all the react native dependencies and start the app on the Android device. That’s it. Easy, right?
In this section, we’ve assumed you’re familiar with building apps with React Native. If you’re a total beginner in the React Native world, see how you can get started with it in the official documentation. Do not use Expo, since there’s no need for that.
3. Run Your Mobile App on iOS
To run the app on iOS there are a few steps you need to follow:
- Install Xcode and Cocoapods
- Install the pods by running “pod update” in the ios folder
- Open the .xcworkspace file in Xcode
- Build & Run the mobile template in Xcode
If you are not a mobile developer expert, we’ve put together a detailed tutorial on how to run native apps on iOS here. Just follow all those steps to run the Real Estate app on iOS.
4. Link Your Own Firebase Account
By default, you buy our app templates that are using a Firebase account used for our demos. In order to make the app use your own Firebase backend, you need to link the React Native template to your own Firebase instance. Fortunately, doing that requires only a few clicks. All you need to do is create a new mobile app in Firebase and override the default Google config files with your own Check out the documentation for the React Native Firebase integration for more detailed steps.
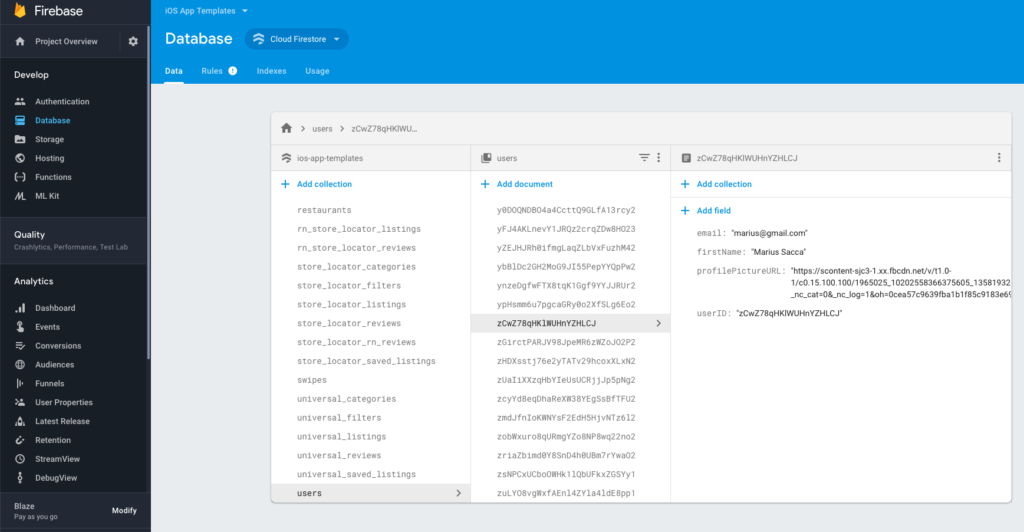
Once you’ve linked your own Firebase account to the Real Estate app, run the app again and create a few users. All the registrations should show up in Firebase -> Database -> Cloud Firestore tables. Your logins will also show up in Firebase Authentication table.
5. Add Your Own Categories and Filters to Firebase
The last and most important step is to finally add your own categories, filters and property listings to Firebase. After all, you don’t want your users to see an empty app. To do that, you need to populate your Firebase Firestore database with two tables and their entries.
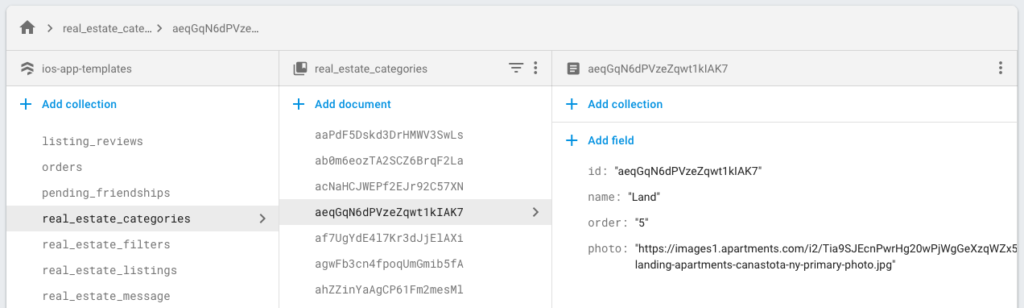
- Create a new collection named “real_estate_categories” and add all your categories to it. Make sure you specify all the fields correctly, with no typos: id, name, order, and photo. These will be displayed in your app.
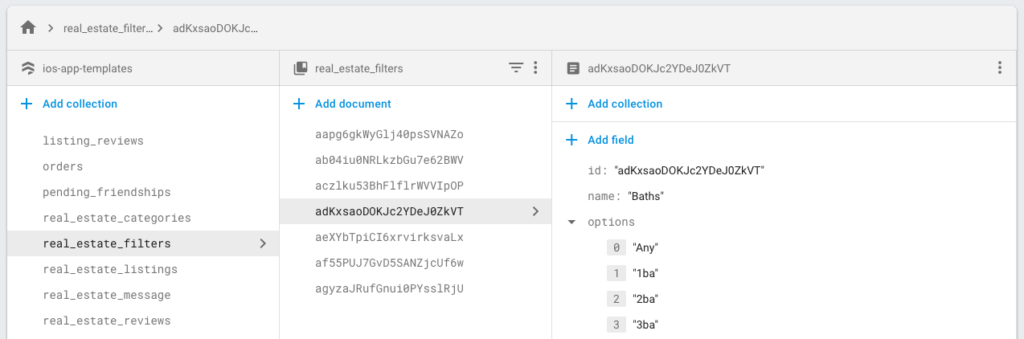
- Add a new collection named “real_estate_filters” and add all of your filters in it. For each filter, specify their id, name, and options, as pictured below. Do not make any typos. The “options” field is an array of strings, containing all the values that a given filter can have.
Now that you’ve added categories and filters, your real estate app is 100% usable. Run it again and observe. You can finally start adding your real estate listings, directly in the app.
6. Enable Firebase Storage
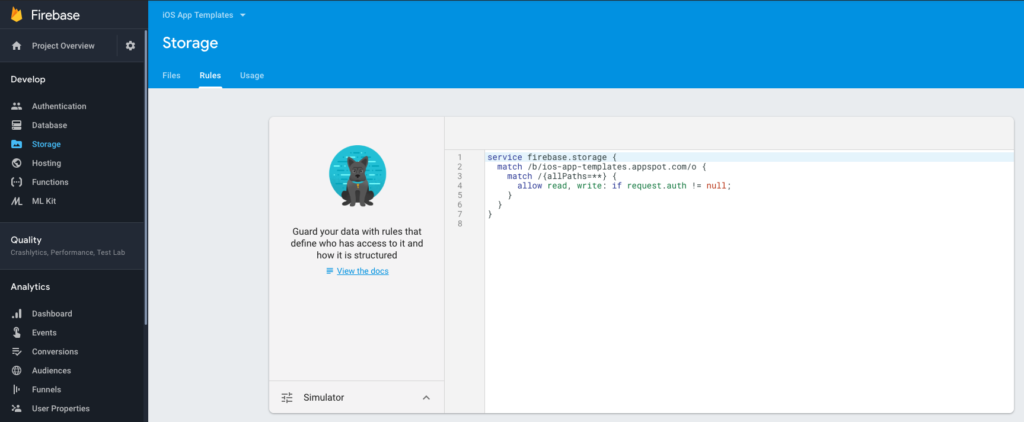
If you want your users to be able to upload their own listings, you need to enable Firebase Storage in the Firebase Console. This is mandatory since the listing photos are being uploaded to Firebase Storage. To enable it, just go Storage in the left menu. This is how your Storage rules need to look like in order for the app to function correctly:
7. Further Customizations
For more advanced customizations, you need to make code changes here in there. The good news is that our react native templates are highly modularized, so even someone who doesn’t know how to code can customize the app. In this section, we are laying out a few tips and tricks.
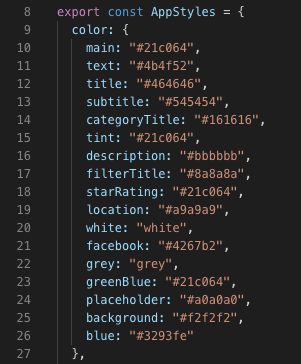
7.1 How do I change colors, icons, and fonts?
Locate the src/AppStyles.js file and change anything you’d like. Make sure you re-run the app after each change so that the customizations come into effect.
7.2 How do I specify what listings to show up on the home screen?
By default, you won’t see any listings on the home grid when you switch to your own Firebase backend. That’s because you need to specify which category ID you’d like to show properties from. To do that, locate the src/screens/HomeScreen.js file and change the homeCategoryId flag to the category you want.
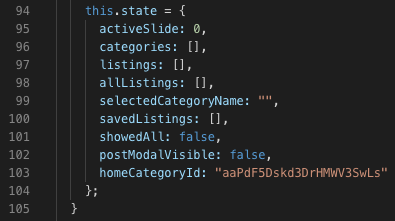
You can find your ID in the Firebase database table, which you added at the previous step.
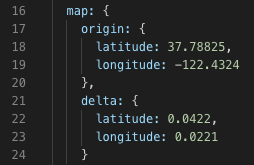
7.3 How do I change the initial map location when posting a new property?
Open the src/Configuration.js folder and change the desired latitude and longitude.
Congratulations! You’ve just finished your real estate app development and you have a brand new app, fully functional ready to be published to the app stores. You’ve just made your own Zillow clone, so go out and celebrate.