In order to make your own restaurant app quickly and cost-efficient, you need to download our react native food delivery app template. Once you buy the source code, you’ll want to be able to run it on your devices. To do that, we’ve created this detailed tutorial that’s describing how to make your own food delivery app and how to launch it to Apple Store and Google Play Store. Feel free to skip the sections that are not relevant to you.
Adding Restaurant data to Firebase
1. Create your own Firebase app
Head over to Firebase Console and create a new project, by clicking “Add Project”. Type in the desired name and add your project. Make sure you are logged in first.
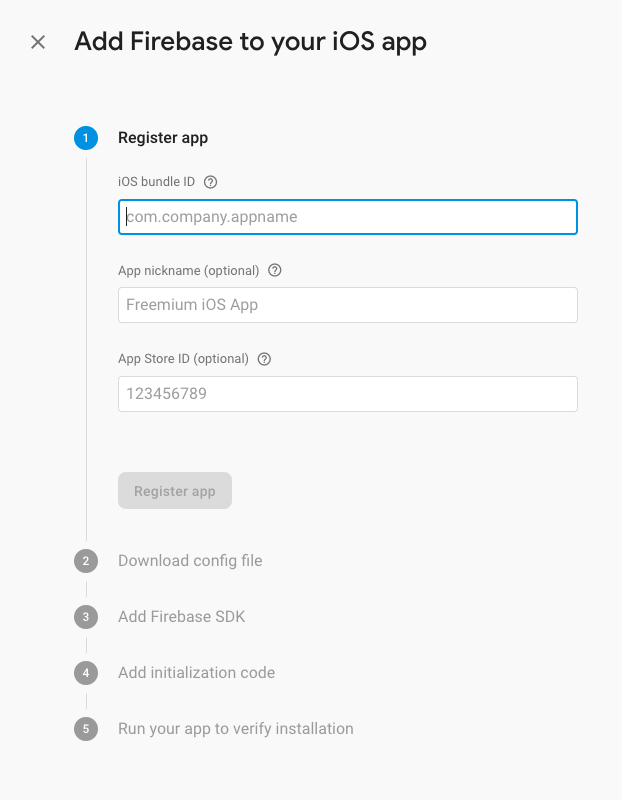
2. Create a new iOS and Android app and link them to your project

Tap the “+” button showing up below the title of the project, choose the type of app you want to add and fill out the form as follows:
- for iOS, use “org.reactjs.native.example.RestaurantApp” as the Bundle ID. Leave the remaining fields empty
- for Android, use “com.restaurantapp” as the Package Name. Leave the optional fields empty
3. Turn on Firebase Authentication and Firebase Firestore
You can do this in the Firebase Console, after selecting your newly created project. Please make sure you enable Facebook in the Sign In methods tab of Firebase Auth console.
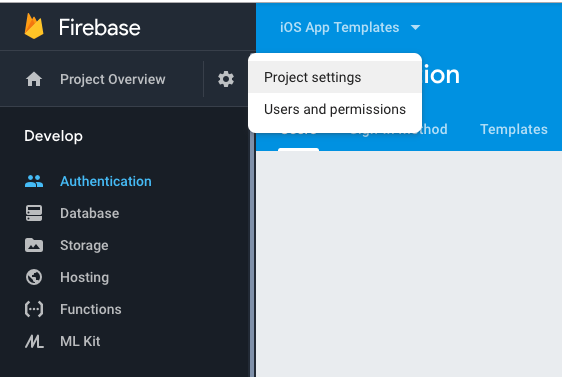
4. Download and override configuration files
Head over to Project Settings, which can be found on the sidebar menu, under the Settings icon (pictured below).
Select your app and download the configuration files:
- for Android, google-services.json. Download this file and replace it with the one existing at path_to_downloaded_template/android/app/google-services.json
- for iOS, GoogleService-Info.plist. Download this file and replace it with the one existing at path_to_downloaded_template/ios/RestaurantApp/GoogleService-Info.plist.
This is step is necessary to give access to your restaurant app to the Firebase Database.
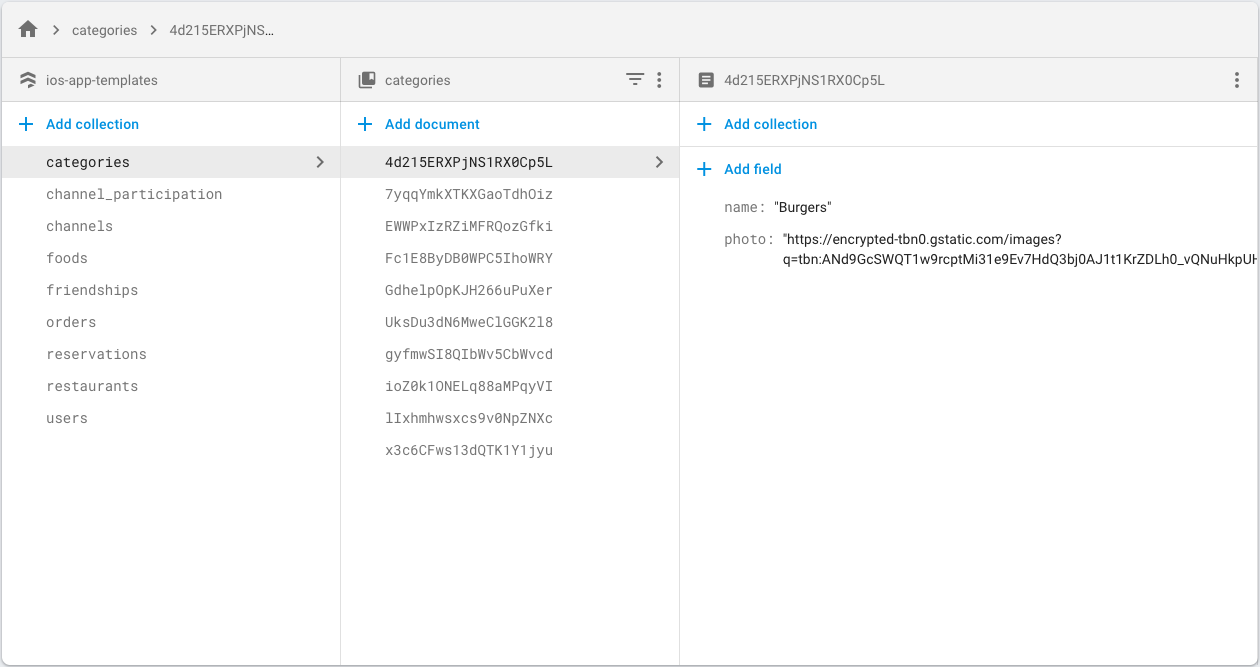
5. Add your food items and categories into Firebase Firestore
Since our app template is using Firebase as the backend, you need to add all the data displayed in our custom app to Firebase. The format of structuring this data is very strict, so please make sure you follow the suggested pattern, to reduce bugs and uncertainties. There are two data collections you want to add:
- Food Categories (“categories”)
- Each food category contains two properties: name (string) and photo (url)
- Here’s an example of how our categories collection looks like
- Food Items (“foods”)
- Each food item contains several properties, used to showcase the products within the mobile app:
- name – the name of the product
- photo – the main image of the food product (it’s an URL)
- category – the collection ID of the product’s category
- description – a string representing a short description of the food item
- price – a string representing the price
- details – an array (a list) of image URLs, that are being displayed in the carousel on the food item details screen
- Please make sure you add all this information to the database to avoid running into any issues with the food delivery mobile app. Pay special attention to the category field since it must match an existing category from the categories collection
- Here’s an example of how our sample foods collection looks like:
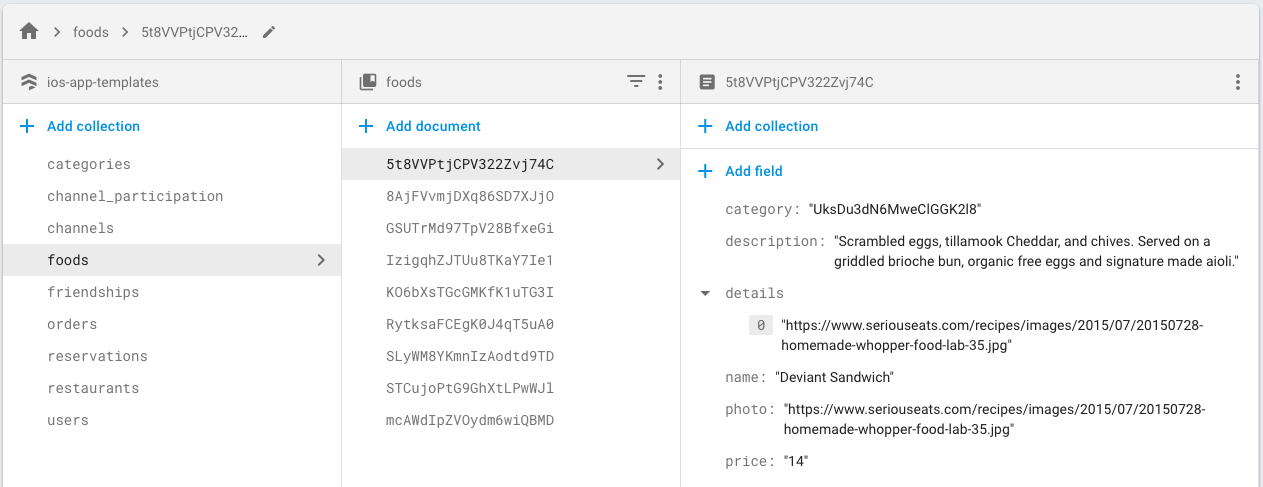
- Each food item contains several properties, used to showcase the products within the mobile app:
The collections for reservations and orders will be automatically created as you add orders and reservations via the mobile app. Once you play around with the real app, you can come back to Firestore and check out the orders and reservations that were created within the food delivery app. This is where you find all the data from your customers.
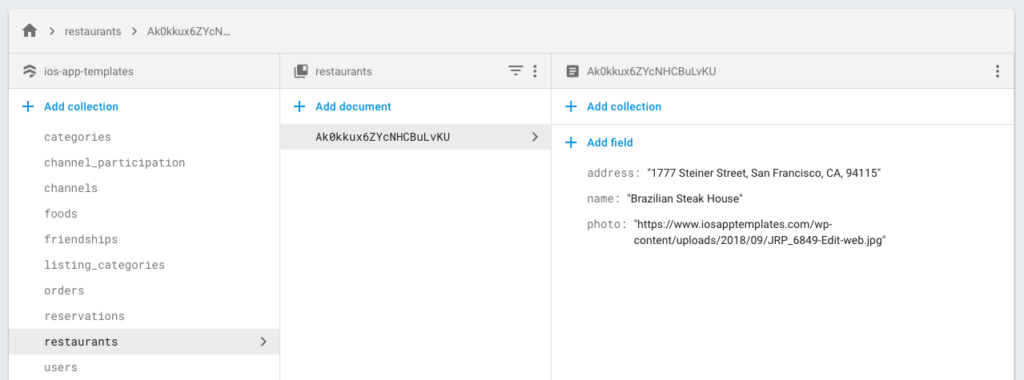
6. Add your Restaurant Details to Firebase
Create a “restaurants” collection, containing one single document that encapsulates the address, name and cover photo of your restaurant. This information is being used on the Reservations screen. Make sure you are using the exact field names.
Building the iOS Restaurant App
1. Locate the downloaded folder and go to that path, by running
cd ~/Users/your_user/Downloads/Restaurant-UberEats
in your terminal.
2. Install the node.js dependencies, by running
npm install
This will work only if you already installed Node.js in the past. If not, you have to install it first, by following the steps listed on the official npm website.
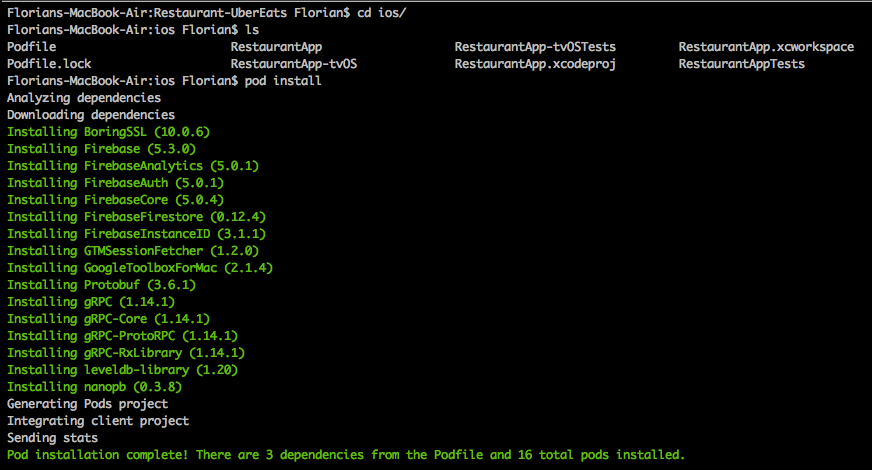
3. Install CocoaPods dependencies
> cd ios

> pod install
First, you’re moving to the ios folder, which is where the iOS Xcode project lives. In here, there’s a Podfile file, which contains the iOS dependencies the project is relying on. By running pod install, you are basically downloading all the libraries that are used by your app. If you never used CocoaPods before, follow the official CocoaPods guide to install it. Here’s a screenshot of the expected outcome:
4. Open the Xcode workspace project by running
open RestaurantApp.xcworkspace
If you don’t have Xcode installed on your machine, please download it first. Xcode is the IDE that’s facilitating iOS development.
5. Override the Firebase configuration files
If you haven’t done this already, please refer to the first section, step 4. These files are giving you access to the Firebase Database, so it’s critical to do this if you want the app to show your own products, rather than our examples.
6. Update Facebook Login details with your own Facebook App Info
You’ll need to make a couple of changes, in order to have your users log into your own Facebook app. First, you’ll need to create an iOS Facebook app on the Facebook Developers portal, if you don’t have one already.
Locate the ios/RestaurantApp/Info.plist file and open it in a text editor. Update the part related to Facebook configuration, provided by the Facebook guide with your own details.
<key>CFBundleURLTypes</key>
<array>
  <dict>
  <key>CFBundleURLSchemes</key>
  <array>
    <string>fb285315185217069</string>
  </array>
  </dict>
</array>
<key>FacebookAppID</key>
<string>285315185217069</string>
<key>FacebookDisplayName</key>
<string>iOSAppTemplates</string>
Facebook will ask you for a Bundle Identifier – just use “org.reactjs.native.example.RestaurantApp“.
7. Build & Run the iOS Restaurant app by clicking Product -> Run (or Command + R) in Xcode. Make sure you’re choosing which device you want to run the app in the top menu bar. You can choose any installed iOS simulator or a plugged-in iPhone or iPad. If you need more details on how the iOS development process in Xcode works in general, check out Apple’s documentation.
At this point, you’re supposed to have a running instance of the restaurant app, that’s displaying data from our sample Firestore Database or from your own database if you did step 5.
8. Submit the app to App Store
Follow Apple’s guidelines on how to submit our iOS food delivery app to App Store. As a protip, make sure you’re using great screenshots and great descriptions, to optimize for app installs.
Running the Android Restaurant app
1. Identify the purchased archive folder and go to that path, by running
cd ~/Users/your_user/Downloads/Restaurant-UberEats
2. Install the JavaScript dependencies, by running
npm install
This will work only if you already installed Node.js in the past. If not, you have to install it first, by following the steps listed on the official npm website.
3. Open an Android Emulator
The easiest way to start an Android Emulator is to take advantage of the functionality built-in Android Studio. Download Android Studio, open it and go to Tools -> AVD Manager. Here, you can choose what Virtual Device you want to open. Start it by tapping on the “Play” button.
3.1. (Alternatively) Plug in an Android device
If you don’t want to deal with Android Studio and virtual devices, and you already have a physical Android device, just plug it in and accept the requested permissions.
4. Replace the Firebase configuration file in android/app/google-service.json.
You’ve probably done this in the Firebase section above (step 4).
5. Update the Facebook Login configuration with your own Facebook app details
Open the file located at android/app/src/main/res/values/strings.xml and replace the facebook_app_id with your own id.
<string name="facebook_app_id">your_own_FB_Android_APP_ID</string>
For this, you’ll need to create an Android app in the Facebook Developers portal. Check out this quick overview detailing how you can achieve that.
You’ll be using “com.restaurantapp” as the Package Name and “com.restaurantapp.MainActivity” as the Default Activity Class Name.
6. Build & Run the Restaurant app template, by running
react-native start && react-native run-android
That’s it. This should be starting the app in the emulator or the physical device that’s plugged in. You should be able to see all the categories and food items added in the first section, as well as creating orders and restaurant reservations. Check out the Firestore Database to see the new orders & categories that your customers are making.
7. Publish the food delivery app to Google Play
Follow Google’s instructions to submit your Android app to the Play Store, by using the Play Console tool.
Please don’t hesitate to contact us if there’s anything we might have missed in this React Native tutorial.
Frequently asked questions
1. I’m getting the following error while building the project in Xcode:
"third-party: 'config.h' file not found
This error might show up in the old versions of React Native. In order to fix it, locate the glog folder
cd node_modules/react-native/third-party/glog-0.3.4/
and run the config script manually
./configure
Now you can open Xcode and re-build the app
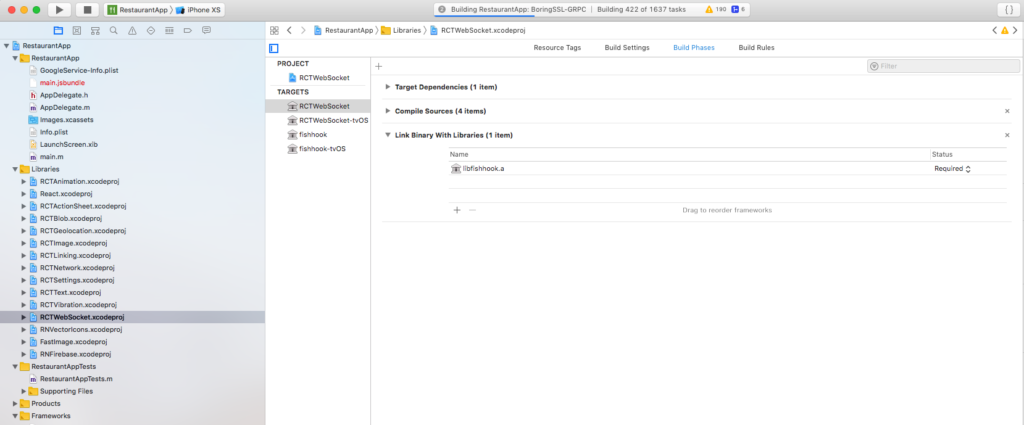
2. While running the project in Xcode 10, I’m getting this build error:
error: Build input file cannot be found: '/Users/.../Restaurant-UberEats/node_modules/react-native/Libraries/WebSocket/libfishhook.a'
Identify the RCTWebSocket project which lives under the Libraries folder. In the “Link Binary with Libraries” section, remove libfishhook.a reference and then add it back. This will fix the bad library reference and you’ll be able to run your project again. Here’s a picture to guide you:
3. Facebook Login doesn’t work.
First, make sure you enabled Facebook auth method in the Firebase Auth Console. Unless you explicitly specify this auth method is allowed, the Facebook Login button in your app won’t work. If you’ve already done that, double check you updated the configuration files properly, with our correct Facebook app details.