In this tutorial, we’re detailing the React Native Firebase integration. We’re going to show you what are the steps you need to follow in order to link our React Native app templates to your own Firebase account. Firebase is free and there’s no coding required for integrating it into React Native.
1. Create a Firebase Account and a Firebase Project
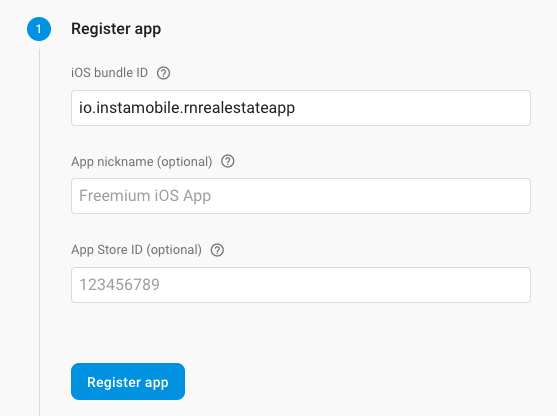
First of all, let’s start by creating your own Firebase account. Head over to Firebase.com and create an account. Once you have created an account, you get access to your own Firebase Console. A Firebase account can host multiple Firebase Projects that can host multiple mobile apps. In the Firebase Console, let’s also create a new project and a new mobile app. If you want your React Native app to run on both iOS and Android, then you need to create a different mobile app for each (in Firebase). Simply click on “Add App” button.
After you select the platform (iOS or Android), you need to provide the app’s identifier. Depending on which React Native template you’ve purchased, it can be different. You can find the correct identifier in the files you’ve downloaded:
- for Android, go to android/app/build.gradle and get the applicationId (usually line 101)
- for iOS, open the app in Xcode and locate the Bundle ID field in the project’s configuration:
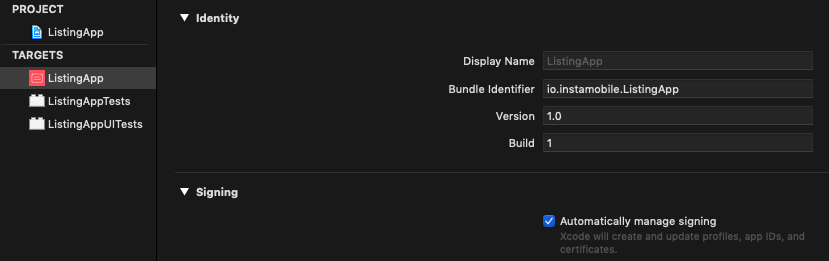
Once you have the bundle ID, just use it in Firebase and create the app.
Note: Before you submit your app to the App Store or Google Play, you’ll need to update these bundle identifiers with your own unique identifiers, since the app stores don’t allow duplicate application ids.
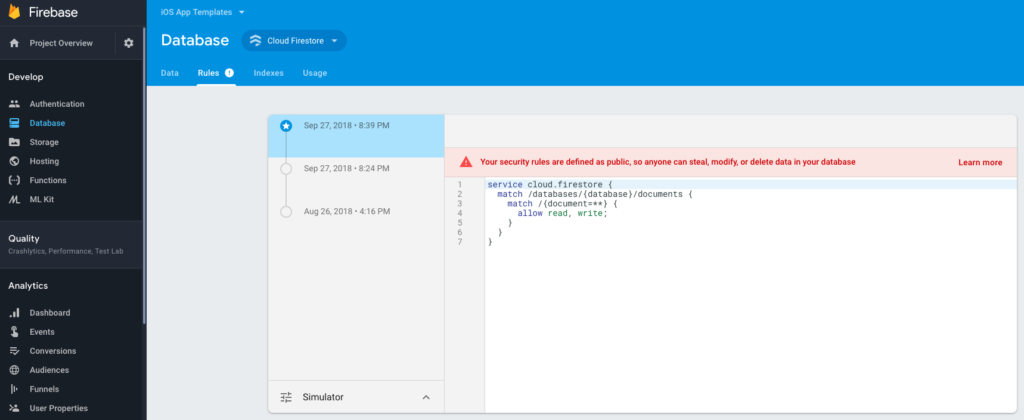
2. Set Database Access Rules to Public
In order to allow the mobile app to read and write data to/from Firebase Firestore, we need to set up the correct access permissions. To do that, just head over to Database -> Cloud Firestore and set the Rules for writes and reads to public.
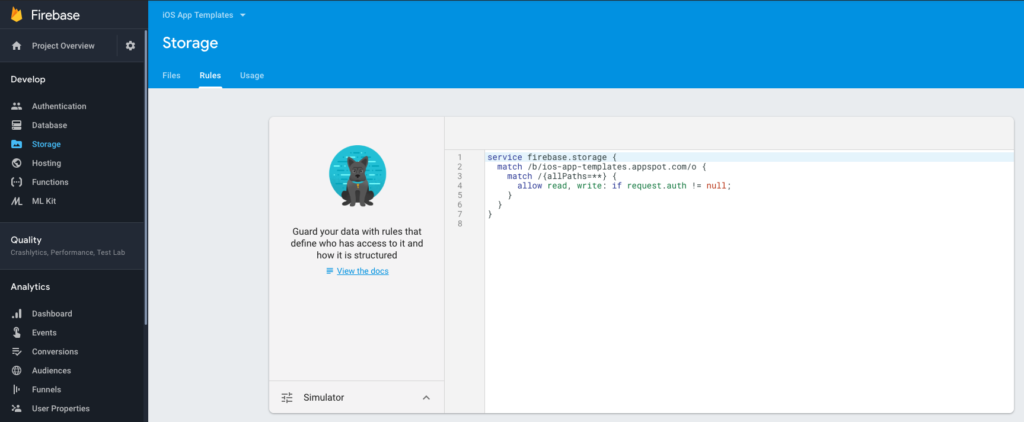
3. Enable Firebase Storage
If your mobile app needs access to Firebase Storage (e.g. for uploading photos and videos, for instance), you have to enable Firebase Storage, so that the functionality works properly. To enable it, just go the Storage in the left menu. This is how your Storage rules need to look like in order for the app to function correctly:
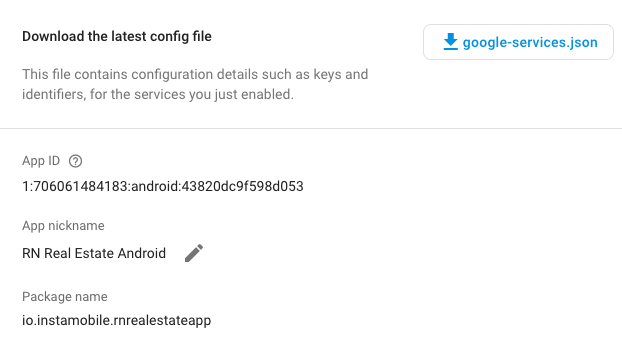
4. Download and Replace Google’s Configuration file
Once you’ve created the app, Firebase will generate a configuration file for you. You will add this file in your React Native app. This is how the React Native app can use your own Firebase backend. To do that, just download the configuration file and replace the existing mock files:
- iOS: Download the GoogleService-Info-plist file and override the existing ios/NameOfApp/GoogleService-Info.plist file.
- Android: Download the google-service.json file and replace the existing android/app/google-service.json file.
If you already had an app in Firebase, you can find and download this configuration file in Firebase Console -> Project Settings.
That’s it. Now, when you run your brand new React Native template, the mobile app will use your own Firebase backend, as opposed to our default one. Make sure you add all the tables and the required data in your Firebase so that the app will have items to display (e.g. food categories, chat messages, etc.). To quickly test the react native firebase integration, try registering a new user and see if they show up in Firebase -> Authentication tab.
To finish up your integration, head back to the specific app template documentation and see how the Firebase database structure looks like.