In this tutorial, we are going to give a quick introduction to React Native hooks. Hooks in React are available since the version 16.7.0-alpha. These functions allow us to use React state and a component’s lifecycle methods in a functional component. If you are familiar with React, you know that the functional component has been called as a functional stateless component. Not any more.
At Instamobile, we have already migrated all of our React Native templates to hooks, so we thought it’d be a good idea to write about our learnings from operating with React Native hooks.
Previously, a class component allowed you to have a local state. Hooks do not work with classes. Also, using Hooks, there is no requirement to refactor a class component React Native into a functional component only because you want to introduce local state or lifecycle methods in that component. In other words, Hooks allow us to write apps in React with function components.
React provides a few built-in Hooks such as useState and useEffect. You can also create your Hooks to re-use to manage state between different components.
In this tutorial, let us take a look at some of the hooks and build a demo React Native app using them and functional components.
Getting started
Once you installed react-native-cli you can begin by generating a React Native project. Run the below command to initialize a new React Native project. Also, note that you can name your React Native app anything.
react-native init rnHooksDemo

cd rnHooksDemo
Functional components by default
By default, react native apps generated with the latest react-native-cli comes with a basic functional component. You can go through this in the App.js file.
/**
 * Sample React Native App
 * https://github.com/facebook/react-native
 *
 * @format
 * @flow
 */

import React from 'react'
import {
  SafeAreaView,
  StyleSheet,
  ScrollView,
  View,
  Text,
  StatusBar
} from 'react-native'

import {
  Header,
  LearnMoreLinks,
  Colors,
  DebugInstructions,
  ReloadInstructions
} from 'react-native/Libraries/NewAppScreen'

const App: () => React$Node = () => {
  return (
    <>
      <StatusBar barStyle='dark-content' />
      <SafeAreaView>
        <ScrollView
          contentInsetAdjustmentBehavior='automatic'
          style={styles.scrollView}>
          <Header />
          {global.HermesInternal == null ? null : (
            <View style={styles.engine}>
              <Text style={styles.footer}>Engine: Hermes</Text>
            </View>
          )}
          <View style={styles.body}>
            <View style={styles.sectionContainer}>
              <Text style={styles.sectionTitle}>Step One</Text>
              <Text style={styles.sectionDescription}>
                Edit <Text style={styles.highlight}>App.js</Text> to change this
                screen and then come back to see your edits.
              </Text>
            </View>
            <View style={styles.sectionContainer}>
              <Text style={styles.sectionTitle}>See Your Changes</Text>
              <Text style={styles.sectionDescription}>
                <ReloadInstructions />
              </Text>
            </View>
            <View style={styles.sectionContainer}>
              <Text style={styles.sectionTitle}>Debug</Text>
              <Text style={styles.sectionDescription}>
                <DebugInstructions />
              </Text>
            </View>
            <View style={styles.sectionContainer}>
              <Text style={styles.sectionTitle}>Learn More</Text>
              <Text style={styles.sectionDescription}>
                Read the docs to discover what to do next:
              </Text>
            </View>
            <LearnMoreLinks />
          </View>
        </ScrollView>
      </SafeAreaView>
    </>
  )
}

const styles = StyleSheet.create({
  scrollView: {
    backgroundColor: Colors.lighter
  },
  engine: {
    position: 'absolute',
    right: 0
  },
  body: {
    backgroundColor: Colors.white
  },
  sectionContainer: {
    marginTop: 32,
    paddingHorizontal: 24
  },
  sectionTitle: {
    fontSize: 24,
    fontWeight: '600',
    color: Colors.black
  },
  sectionDescription: {
    marginTop: 8,
    fontSize: 18,
    fontWeight: '400',
    color: Colors.dark
  },
  highlight: {
    fontWeight: '700'
  },
  footer: {
    color: Colors.dark,
    fontSize: 12,
    fontWeight: '600',
    padding: 4,
    paddingRight: 12,
    textAlign: 'right'
  }
})

export default App
To see it in action, go ahead, and start the metro server using yarn start. Also, do not forget to build the app for a specific platform. For the demonstration purpose, I am going to use an iOS simulator.
Run the below command to build the app for iOS or Android.
# for ios
react-native run-ios

# for android
react-native run-android
Implementing Hooks in a React Native app
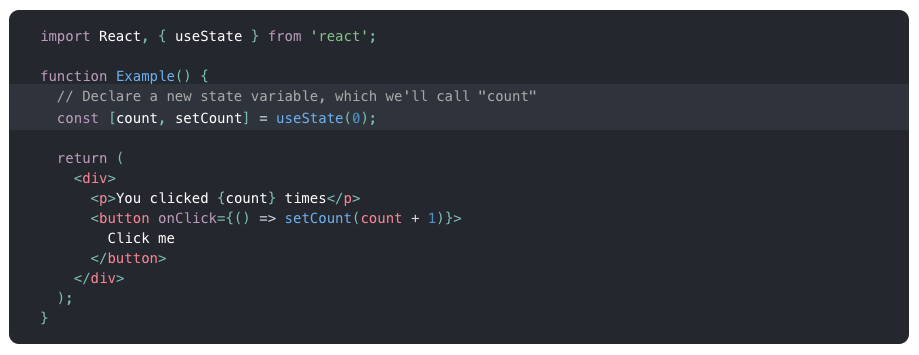
To clearly understand how functional components could be leveraged to manage a state’s component, let us try to go through one of the most basic examples by leveraging one f the few built-in Hooks like useState.
Open App.js and past the following snippet. Start by creating by importing useState from the React library. Then, using a functional component you can define a default state variable as shown below. If there were classes present, you would be adding the state object. Using hooks, the syntax has changed.
import React, { useState } from 'react'
import { StyleSheet, Text, View, Button } from 'react-native'

function App() {
  const [count, setCount] = useState(0)

  return (
    <View style={styles.container}>
      <Text>You clicked {count} times.</Text>
      <Button
        onPress={() => setCount(count + 1)}
        title='Click me'
        color='blue'
        accessibilityLabel='Click this button to increase count'
      />
    </View>
  )
}
React preserves the state between all the re-rendering that happens. The hook useState returns a pair of values. In the above snippet, the first one being the count which is the current value and the second, setCount is a function that lets you update the current value.
You can call setCount function from an event handler just like inside a class component. It is similar to this.setState in a class component. In above snippet, you are using the function inside the button component: setCount(count + 1).
The value of 0 passed as the only argument inside useState(0) hook represents the initial state. This means that you defining an initial state value for count as 0. This is the value from which the counter will start.
Using the StyleSheet object, add the following styles.
const styles = StyleSheet.create({
  container: {
    flex: 1,
    justifyContent: 'center',
    alignItems: 'center',
    backgroundColor: '#F5FCFF'
  },
  welcome: {
    fontSize: 20,
    textAlign: 'center',
    margin: 10
  },
  instructions: {
    textAlign: 'center',
    color: '#333333',
    marginBottom: 5
  }
})
The simulator will show you a similar result as below.

If you play around a bit and hit the button Click me, you will see the counter’s value is increased.

The App component is nothing but a function that has state. You can even refactor it like below by introducing another function to handle Button touch event and it will still work. Modify the App.js file as shown below.
function App() {
  const [count, setCount] = useState(0)

  function handleTouch() {
    setCount(count + 1)
  }

  return (
    <View style={styles.container}>
      <Text>You clicked {count} times.</Text>
      <Button
        onPress={() => handleTouch()}
        title='Click me'
        color='blue'
        accessibilityLabel='Click this button to increase count'
      />
    </View>
  )
}
How to use useEffect hook to add side-effects?
The useEffect hook has an important feature that allows functional components to have access to lifecycle methods to manage side-effects.
Remember, the lifecycle methods such as componentDidMount, componentWillUnmount and componentDidUpdate, that you often use in a class component? You can achieve similar functionality in your React Native apps using useEffect instead of them.
Start by importing useEffect from the react in App.js file.
import React, { useState, useEffect } from 'react'
In this example, on the initial render of the App component, let us display some random text block from a placeholder API. Add another state variable called data to store the data after it is fetched from the placeholder API. Do pass an empty string since the value coming from the API is going to be of string type.
const [data, setFetchData] = useState('')
Next, let us use useEffect just the way you would use componentDidMount in a class component to fetch data from an external API. This hook accepts a callback function. Add the following snippet.
useEffect(() => {
  fetch('https://jsonplaceholder.typicode.com/posts/1', {
    method: 'GET'
  })
    .then(response => response.json())
    .then(json => {
      setFetchData(json.body)
    })
    .catch(error => {
      console.error(error)
    })
}, [data])
The Effect Hook is a combination of all of these three lifecycles we have discussed before. By using this hook you are telling the React component to do something after the render. The useEffect runs after every render by default. However, there are ways to prevent that default behavior. One is to pass [data] as the second argument which tells the callback function to only render once, conditionally until the data is fetched.
Modify the return inside App.js file to fetch and display the mock data.
return (
  <View style={styles.container}>
    <Text>You clicked {count} times.</Text>
    <Button
      onPress={() => handleTouch()}
      title='Click me'
      color='blue'
      accessibilityLabel='Click this button to increase count'
    />
    <View style={{ backgroundColor: 'red' }}>
      <Text style={{ color: 'white' }}>{data}</Text>
    </View>
  </View>
)
The text is going to be shown inside the red background.

This completes our tutorial. I hope this tutorial helps you understand the basics of React Hooks and then implement them with the favorable mobile app development framework: React Native.
Next Steps
Now that you have learned about resources to learn React Native development, here are some other topics you can look into
- Firebase — Push notifications | Firebase storage
- How To in React Native — WebView | Gradient| Camera| Adding GIF| Google Maps | Redux | Debugging |
Hooks| Dark mode | Deep-link | GraphQL | AsyncStorage | Offline |Chart | Walkthrough | Geolocation | Tinder swipe | App icon | REST API - Payments — Apple Pay | Stripe
- Authentication — Google Login| Facebook login | Phone Auth |
- Best Resource – App idea | Podcast | Newsletter| App template
If you need a base to start your next React Native app, you can make your next awesome app using many React Native template.