Gradients bring out a colorful taste in our apps. So it’s important to know how and when to use them in your mobile apps. In React Native, gradients are extremely easy to integrate and in this article we are going to describe exactly how to implement them. There are mainly two types of linear gradients in React Native and CSS: Linear and Radial gradient Two of the most used JavaScript libraries for generating gradients in React Native are
expo-linear-gradientandreact-native-linear-gradient
They are both very similar and for this article on gradients in React Native we’re going to make use of expo-linear-gradient.  Installation: 1. For Expo:
 expo install expo-linear-gradient 2. For bare projects: a. Install and configure unimodules b.expo install expo-linear-gradient c. cd ios && pod install First use case of gradients are to make buttons look solid: 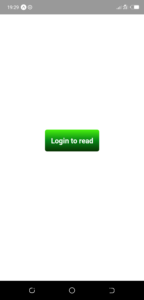
import React from "react";
import { StyleSheet, Text, View, Button } from "react-native";
import { LinearGradient } from "expo-linear-gradient";

function GradientExampleOne() {
  return (
    <View style={styles.container}>
      <LinearGradient
        colors={["#48F10E", "#078716", "#093203"]}
        style={styles.buttonContainer}
      >
        <Text
          style={styles.buttonText}
        >
          Login to read
        </Text>
      </LinearGradient>
    </View>
  );
}

const styles = StyleSheet.create({
  container: {
    flex: 1,
    backgroundColor: "#fff",
    alignItems: "center",
    justifyContent: "center",
  },
  buttonContainer: {
    padding: 15,
    alignItems: "center",
    borderRadius: 5
  },
  buttonText: {
    fontWeight: "bold",
    fontSize: 18,
    color: "#fff",
  }
});
The color prop accepts an array of colors to be displayed in a linear gradient. Let’s make another nice thing with gradients: We are going to combine an image with a gradient, like the example below:  Now, what’s going on here? We’re overlaying a gradient on an ImageBackground, a React Native component and then reduce the opacity of the gradient. Then we center our the text inside the LinearGradient.
import React from "react";
import { StyleSheet, Text, View, ImageBackground } from "react-native";
import { LinearGradient } from "expo-linear-gradient";

function GradientExampleOne({ navigation }) {
  return (
    <View style={styles.container}>
      <ImageBackground source={require('./assets/workspace.jpg')} style={styles.imgBackground}>
        <LinearGradient
          colors={["#09203f", "#537895"]}
          start={[0.1, 0.1]}
          style={styles.linearGradient}
        >
          <Text style={styles.text} >Linear Gradient Example</Text>
        </LinearGradient>
      </ImageBackground>
    </View>
  );
}

const styles = StyleSheet.create({
  container: {
    flex: 1,
    backgroundColor: "#fff",
    alignItems: "center",
    justifyContent: "center",
  },
  imgBackground: {
    flex: 1,
    width: "100%",
    alignItems: "center",
  },
  linearGradient: {
    width: '100%',
    height: '100%',
    opacity: 0.95,
    justifyContent: 'center',
    alignItems: 'center'
  },
  text: {
    color: '#fff',
    fontSize: 40,
    fontWeight: 'bold',
    textAlign: 'center'
  }
});
I introduced a prop start, the start prop is an array to tell the gradient where to start. The first element positions the gradient horizontally(x-axis), while the second element positions the gradient vertically.
For example,
[0.1, 0.2]means that the gradient will start 10% from the left and 20% from the top.
Let us see some visual examples:  This is what a gradient with start [0.9, 0.9] looks like. LinearGradient in React Native is easy and seamless to implement. We have used them to make our buttons have a solid look and feel. We have made a crisp UI background for our text and looked into the start prop. This is how you can implement gradients in React Native. As you can see, it was pretty straightforward.
Next Steps
Now that you have learned about resources to learn React Native development, here are some other topics you can look into
- Firebase — Push notifications | Firebase storage
- How To in React Native — WebView | Gradient| Camera| Adding GIF| Google Maps | Redux | Debugging | Hooks| Dark mode | Deep-link | GraphQL | AsyncStorage | Offline |Chart | Walkthrough | Geolocation | Tinder swipe | App icon | REST API
- Payments — Apple Pay | Stripe
- Authentication — Google Login| Facebook login | Phone Auth |
- Best Resource – App idea | Podcast | Newsletter| App template
If you need a base to start your next React Native app, you can make your next awesome app using many React Native template.